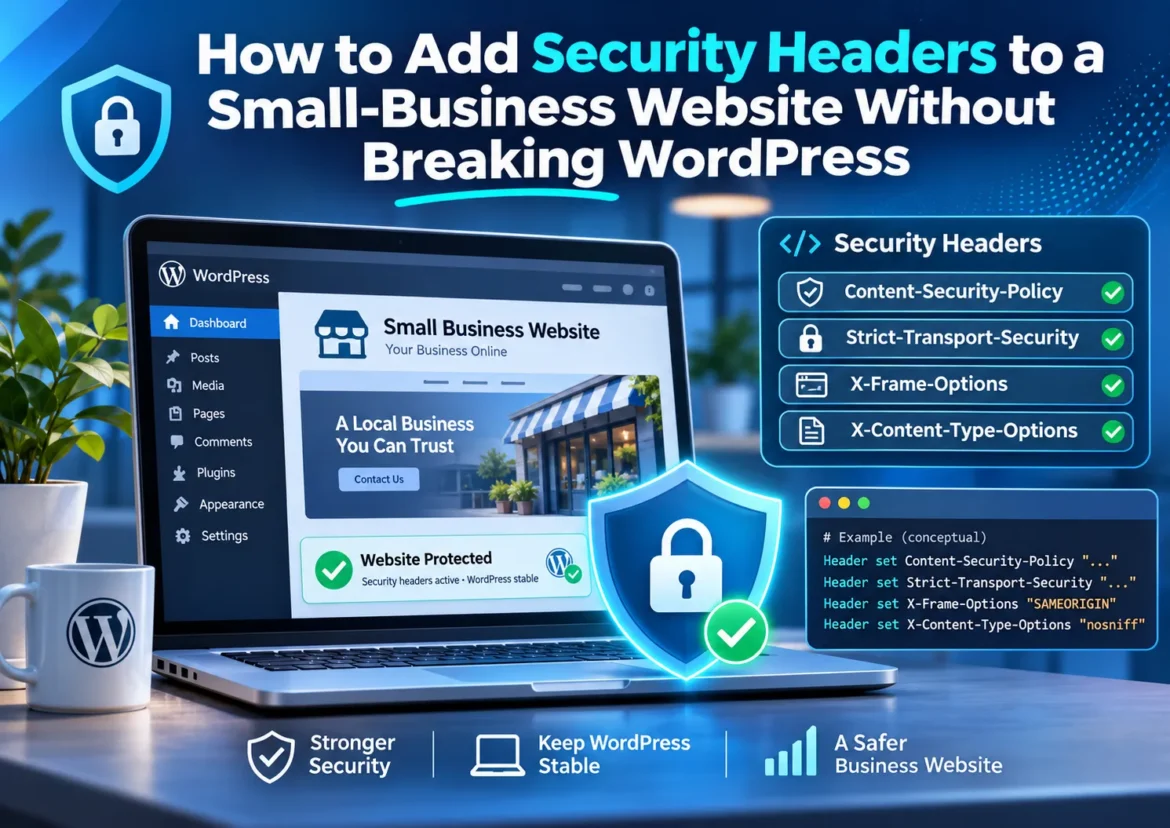
Small-business websites usually spend time on passwords, backups, plugin updates, and malware scans. Those all matter. But there is another layer that is easy to overlook: HTTP security headers.
According to the OWASP HTTP Headers Cheat Sheet, properly configured response headers can help reduce risks such as cross-site scripting, clickjacking, and information disclosure. For WordPress site owners, developers, and freelancers, that makes headers a practical hardening step—not a replacement for patching and access control, but a useful extra line of defense.
The catch is that some headers are low-risk and easy to roll out, while others can break themes, embeds, analytics, or page builders if you apply them too aggressively. Here is a safer way to approach them.
What security headers actually do
Security headers are instructions your web server sends with HTTP responses. Browsers read them and adjust behavior based on the policy you set. That can include forcing future HTTPS use, blocking certain types of content sniffing, limiting referral information, restricting framing, or disabling browser features your site does not need.
For a small-business site, the goal is usually simple: start with the headers that improve security with minimal disruption, then test more restrictive policies carefully.
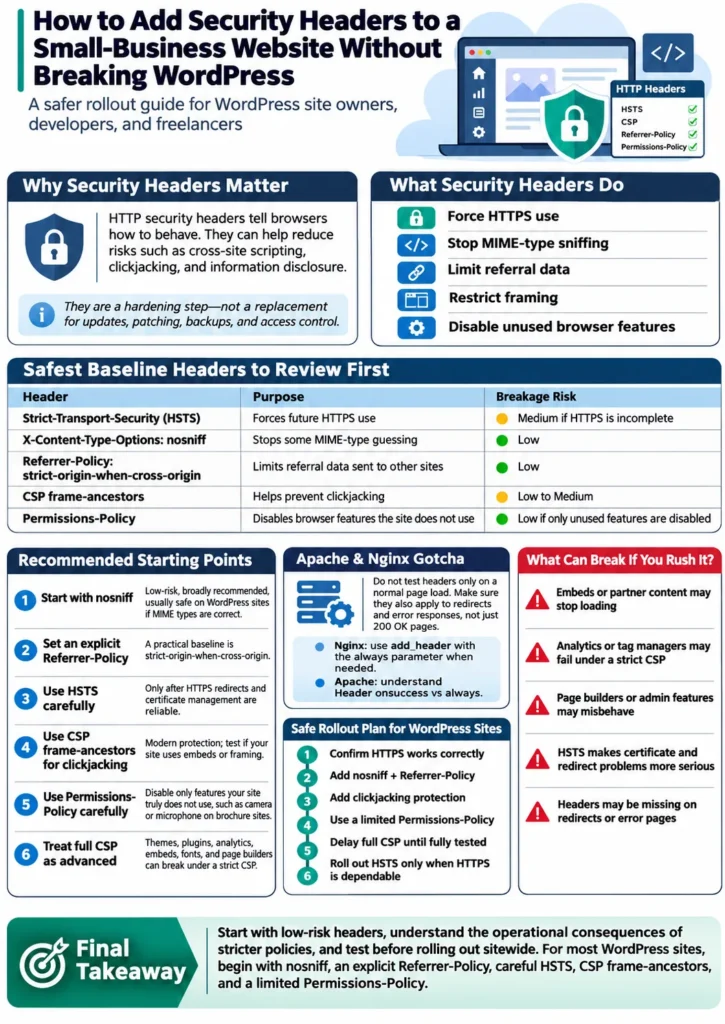
The safest baseline headers to review first
| Header | What it helps with | Risk of breakage |
|---|---|---|
| Strict-Transport-Security | Tells browsers to use HTTPS for future visits | Medium if HTTPS setup is incomplete |
| X-Content-Type-Options: nosniff | Stops some MIME-type guessing by browsers | Low |
| Referrer-Policy: strict-origin-when-cross-origin | Limits referral data sent to other sites | Low |
| Content-Security-Policy frame-ancestors | Helps prevent clickjacking by controlling who can frame your pages | Low to medium depending on site use |
| Permissions-Policy | Disables browser capabilities your site does not use | Low if you only disable unused features |
1) Start with X-Content-Type-Options: nosniff
This is one of the easiest wins. MDN says all sites should set X-Content-Type-Options: nosniff and serve correct MIME types. See MDN’s guidance on MIME type verification and nosniff.
Why it is a good baseline: it has a clear purpose, broad support, and usually does not interfere with normal WordPress functionality if your server is already returning correct content types.
2) Set an explicit referrer policy
OWASP recommends setting Referrer-Policy explicitly rather than relying on browser defaults. A practical baseline is strict-origin-when-cross-origin, which keeps full referrer details for same-origin requests while sending less information to other origins.
For business websites that use analytics tools, payment flows, or outbound links, this is a sensible privacy and security default without being unusually restrictive.
3) Use HSTS only after confirming HTTPS is solid
Strict-Transport-Security, or HSTS, tells browsers to use HTTPS only for future requests. MDN notes an important limitation: it protects future connections after the browser has learned the policy, not the very first insecure visit. It can also prevent users from bypassing some certificate errors once the policy is active. You can review that behavior in MDN’s HSTS reference.
That makes HSTS valuable, but not something to switch on carelessly. OWASP warns that a bad HSTS rollout can lock legitimate users out if certificates expire, are revoked, or HTTPS is not fully reliable.
Practical advice for small sites:
- Only enable HSTS after confirming your site already redirects HTTP to HTTPS correctly.
- Make sure your certificate management is dependable before increasing the policy duration.
- Do not treat HSTS preload as an automatic final step.
About HSTS preload
This is where many generic tutorials oversimplify things. While OWASP includes preload-style examples, hstspreload.org says preloading is not recommended by default and warns that removal can be slow and painful if a domain is not fully ready. If you later choose preload, the site lists current requirements such as a valid certificate, HTTP-to-HTTPS redirect, HTTPS on all subdomains, and an HSTS header with at least one year of max-age, plus includeSubDomains and preload.
For most small-business websites, the better sequence is: deploy standard HSTS first, validate operations over time, then decide whether preload is really worth the commitment.
4) Prefer modern clickjacking protection with CSP frame-ancestors
For clickjacking protection, modern guidance favors CSP’s frame-ancestors directive. MDN’s CSP guide and OWASP both support that direction, with X-Frame-Options mainly useful when older browser compatibility still matters.
If your site should never be embedded in another site, a strict policy like frame-ancestors ‘none’ may fit. If you only want your own site to frame its pages, ‘self’ is the more flexible option.
This matters for WordPress because some sites do use embedded dashboards, payment steps, partner widgets, or other framing scenarios. If you depend on those, test before locking framing down.
5) Treat full CSP as powerful but high-maintenance
Content Security Policy can mitigate XSS and other injection-related risks, but OWASP also says it is complex to configure and maintain. That warning is especially relevant on WordPress sites.
Why CSP can break things:
- themes may rely on inline scripts or styles
- plugins may load assets from multiple domains
- analytics, chat widgets, fonts, video embeds, and tag managers often need explicit allowances
- admin interfaces and page builders may behave differently from the public front end
That is why a conservative guide should not pretend there is one universal CSP that fits every WordPress install. A limited CSP for frame-ancestors is usually much easier to adopt than a full script-loading policy.
6) Use Permissions-Policy to turn off features you do not need
MDN documents Permissions-Policy as a way to control access to browser features such as camera, microphone, or geolocation. For many brochure sites, blogs, and company websites, disabling unused features is a straightforward tightening step.
Examples of capabilities a basic business site may not need include:
- camera
- microphone
- geolocation
If your site actually uses location services, media capture, or similar browser features, do not disable them blindly.
Apache and Nginx gotcha: make headers apply beyond normal page loads
One of the most common implementation mistakes is adding headers and then checking only a successful page load.
On Nginx, the official docs say add_header does not apply to every response by default; it applies only to certain status codes unless you use the always parameter. See the official Nginx header module documentation.
Apache has a similar nuance. The official mod_headers documentation explains that Header behaves differently for onsuccess and always, and that always matters for non-2xx responses such as redirects and some proxied or CGI-generated headers. See the Apache mod_headers documentation.
In practical terms: make sure your policies are present on redirects and error responses too, not just on a homepage that returns 200 OK.
A safe rollout plan for WordPress sites
- Confirm your site already works correctly over HTTPS.
- Start with low-risk headers such as nosniff and an explicit Referrer-Policy.
- Add clickjacking protection with frame-ancestors, and keep X-Frame-Options only if you need older-browser coverage.
- Use a limited Permissions-Policy that disables only features you know the site does not use.
- Delay a full CSP until you have tested themes, plugins, embeds, analytics, and admin workflows.
- Roll out HSTS only after you trust your HTTPS setup, certificate renewal process, and redirects.
What can break if you rush this?
- embedded tools or partner content may stop loading
- analytics or tag managers may fail under a strict CSP
- page builders or admin features may misbehave
- certificate or redirect problems become more serious with HSTS
- headers may appear on some responses but not on redirects or errors if server directives are incomplete
Sample .htaccess Security Header for Wordpress
# BEGIN WordPress Security Headers
<IfModule mod_headers.c>

    Header always set X-Content-Type-Options "nosniff"

    Header always set Referrer-Policy "strict-origin-when-cross-origin"

    Header always set X-Frame-Options "SAMEORIGIN"

    Header always set Permissions-Policy "camera=(), microphone=(), geolocation=()"

    Header always set X-XSS-Protection "0"

</IfModule>
# END WordPress Security Headers
Final takeaway
Security headers are one of the cleaner ways to harden a small-business website without installing another plugin. The best approach is not to chase the longest checklist. It is to start with the headers that are broadly recommended and low-risk, understand which ones carry operational consequences, and test before pushing stricter policies sitewide.
For most WordPress sites, that means beginning with X-Content-Type-Options: nosniff, an explicit Referrer-Policy, careful HTTPS-only enforcement with HSTS, modern clickjacking protection through CSP frame-ancestors, and a limited Permissions-Policy. Full CSP can be worth it, but only when you are ready to map how your site actually loads scripts, styles, embeds, and third-party services.
Sources
- HTTP Headers – OWASP Cheat Sheet Series
- Strict-Transport-Security header – HTTP | MDN
- MIME type verification – Security | MDN
- Content Security Policy (CSP) – HTTP | MDN
- Permissions-Policy header – HTTP | MDN
- Module ngx_http_headers_module
- mod_headers – Apache HTTP Server Version 2.4
- HSTS Preload List Submission